User Chapter Two: Exploring FaciliWorks
Open a Web browser.
Enter the URL in the address field and press Enter.
The FaciliWorks Log In screen will appear; this Log
In window will appear every time FaciliWorks is launched.
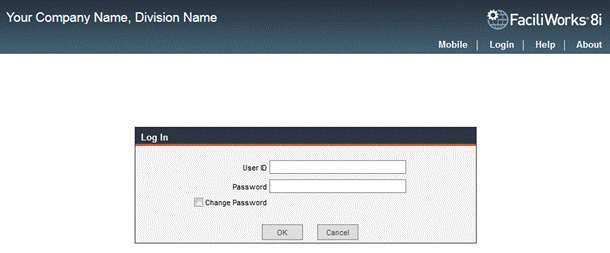
Enter your User ID and Password and click the OK button.
Upon successful login, you are automatically directed to the Dashboard
- a convenient summary of current maintenance, calibration, inventory,
purchase orders and report favorites, depending on your configuration
choices. Return to the Dashboard from any location within the software
by clicking the Dashboard link at the top of the Main Menu.
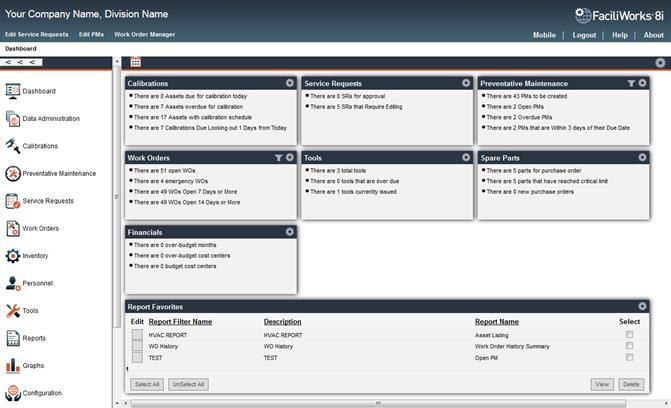
In the center of the Dashboard are Text View summary boxes whose
contents can be configured by clicking any of the Dashboard Settings
icons  . When clicked,
the following window will open:
. When clicked,
the following window will open:
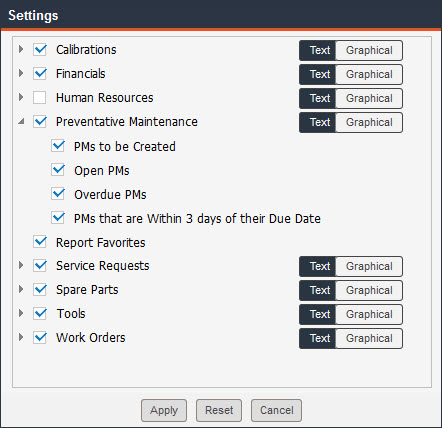
Check the checkboxes for any items you want to be visible on the dashboard
and select either Text or Graphical representation of each.
For both the Preventative Maintenance and Work Orders summary boxes,
you can filter the provided information by a Staff ID or technician
field assignment. This allows you to see only the PMs/WOs that have been
assigned to a particular person. Click the Filter icon  in the appropriate
box on the dashboard; the following window opens:
in the appropriate
box on the dashboard; the following window opens:

Begin typing the technician’s name or Staff ID in the appropriate field,
select from the list of options that appears and then click the Filter
button. The dashboard will then refresh that summary box.
Each line item within a summary box is a hyperlink to those particular
records. When the PM or WO summary boxes are filtered, the hyperlinks
within the summary boxes will automatically redirect you to a filtered
view of the records to show only those records assigned to the selected
person.
Each text box on the dashboard can be dragged and dropped to change
the order of the boxes.
To quickly refresh, change the view of (text or graphical) or hide a
summary box, hover your mouse over the settings icon of that box and click
the appropriate secondary icon:

The Report Favorites section of the dashboard displays an interactive
list of the user’s favorite reports. Within Enhanced Reports, an
option to save filter criteria is provided; doing so saves it to favorites.
See the Enhanced Reports section for more information.
Use the navigation links located in the upper right of the screen to
access various areas of the application or to log out.
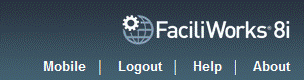
The Logout link logs you
out of the application. It is very important that you log out of the software
using this link; do not use the close button at the top of the window.
Using the close button will not release the user license and will prevent
another user from logging into FaciliWorks.
The Help link opens the help
file.
The About link displays
the number of records in the database, software license information and
serial number and contact information for the FaciliWorks support team.
The Mobile link takes you to FaciliWorks 8i Mobile for smartphones
and tablets. Mobile access must be enabled through the Configuration
-> Admin Settings -> General tab (please see the Administrator
Guide for instructions).
For instructions on how to use FaciliWorks 8i Mobile, please see the
FaciliWorks 8i Mobile User Guide.
The first row of links below the company and division names is a list
of configurable Shortcuts to the forms within FaciliWorks that
you use most frequently. Below the shortcuts are Breadcrumbs which
define your current location within the software.

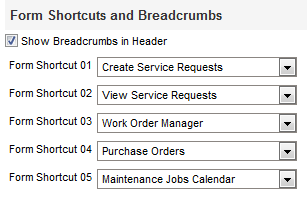
Breadcrumb and shortcut options are defined from within Configuration
-> Global Settings in the Form Shortcuts and Breadcrumbs
pane. Click the Show Breadcrumbs in Header checkbox to make the
breadcrumbs visible, uncheck the checkbox to hide them. For each Form
Shortcut field, use the drop-down to select a form to which the shortcut
will be linked. If you prefer not to use shortcuts, leave these fields
blank.
The Calendar icon is visible in the header bar of the Dashboard
and is a quick and easy way to view any and all scheduled maintenance
jobs.
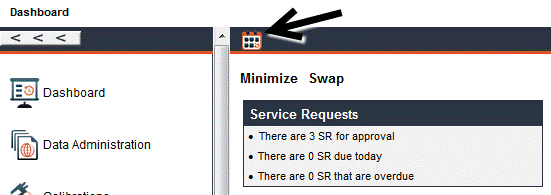
Click the Calendar icon; a new window will open, providing access
to both a Scheduler tab and a Calendar tab.
The Scheduler tab will display all basic created work orders
and PMs. You can estimate time to complete the PM/WO and assign/reassign
PM and WO events to any staff member on any day in an effort to balance
work load among the group. The reassigning of the PM/WO to another date
does not affect the PM due date. Reassign the date by simply clicking
and dragging the PM or WO and dropping it into a new date. Assigning a
PM/WO to a staff member will write back to the PM/WO event (Labor
tab) and will include the estimated hours, if they are assigned from the
scheduler.
If a PM is not assigned to a staff member prior to its creation, the
scheduler will automatically assign all newly created PM events to the
“unassigned tech.”
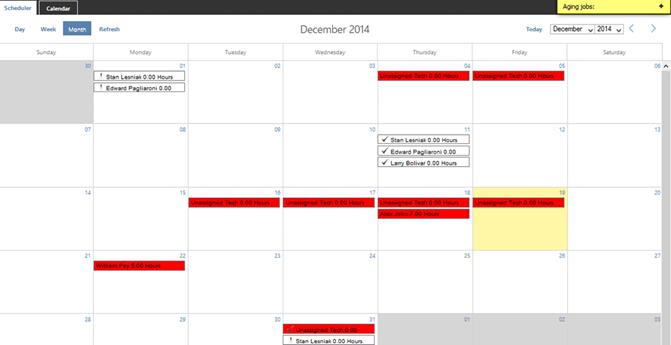
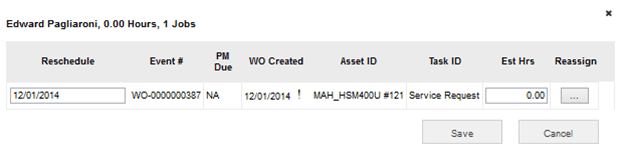
Click on a staff member assignment cell and you will be able to adjust
the date the event will be completed and what staff members will perform
the event.
For an overdue PM, the staff ID cell assignment will be displayed in
red. For a WO assignment, if 7 days open, a check mark icon appears next
to the cell assignment; if 14 days open, an exclamation mark is displayed;
if 30 days open, a circle with x is displayed.
Asset Grouping impacts the user’s ability to filter PM/WO events. User
can also drag and drop date reassignment from the scheduler view.
The Calendar tab allows users to view basic PMs that are open
or are considered to be future iterations, based on the projected due
dates (per the frequency of the PM task). This will allow users to plan
on when PMs should come due based on iterative PM projections, thus decreasing
the likelihood of a week that is overloaded with too many PMs.
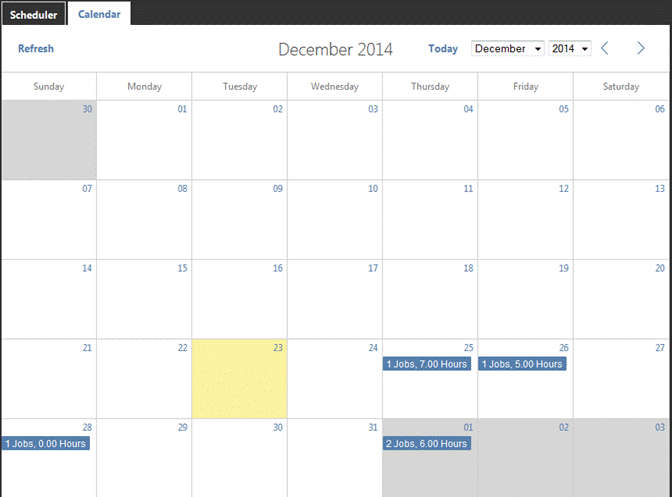
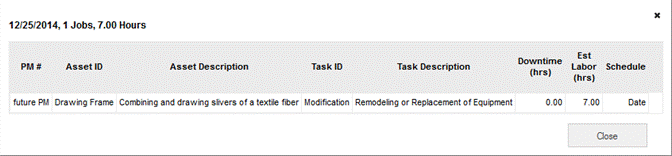
The calendar displays the accumulated number of jobs and estimated hours
for each day. For a summary list of all jobs for a given day, click the
day on the calendar; a new window displays all jobs for that day.
At the bottom middle and right-hand side of the software window are
the User Name of the logged in user and the version/build numbers of FaciliWorks.

On the left side of the Dashboard is the Main Menu. The Main Menu can
be hidden by clicking the Minimize button  and
viewed again by clicking the Maximize button.
and
viewed again by clicking the Maximize button.


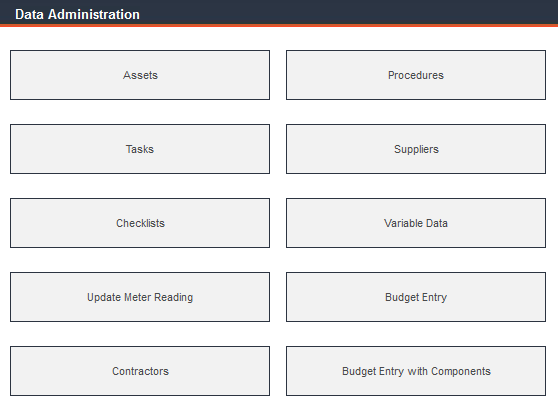
From the Main Menu, access Data Administration to view, add,
modify or delete data or entire records pertaining to assets, tasks, checklists,
meter readings, contractors, procedures, suppliers, variable data and
budgets. Once the data is entered in these modules, it is reusable throughout
the program for creating preventative maintenance and work orders.
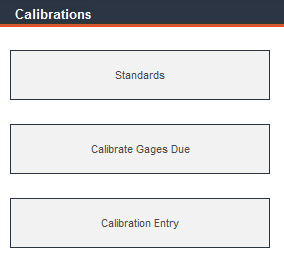
From the Main Menu of FaciliWorks 8i Calibration, access Calibrations
to view, add, modify or delete data or entire records pertaining to calibrations
and standards. A list of gages due for calibration is also found in this
module.
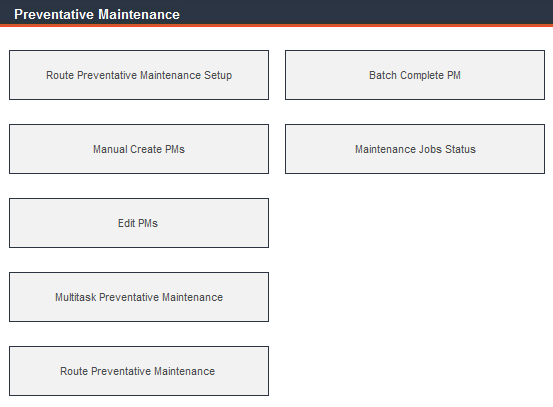
From the Main Menu, access Preventative Maintenance to view,
add, modify or delete data or entire records pertaining to scheduled maintenance
and job status.
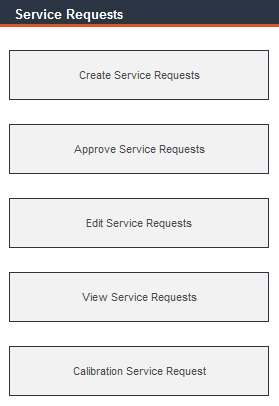
From the Main Menu, access Service Requests to create, approve,
edit and view service requests. Service requests can be created by anyone
in the organization, either outside or within the facilities group.
From the Main Menu, access Work Orders to view, add, modify or
delete data or entire records pertaining to unscheduled work orders and
to view job status. Multitask work orders can also be created in this
module.

From the Main Menu, access Inventory to view, add, modify or
delete data or entire records pertaining to purchase orders and spare
parts inventory. This module also includes Economic Order Quantity
(EOQ) Analysis which analyzes part ordering trends to help optimize
stock levels and reduce expenditures.

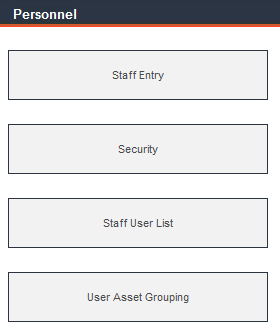
From the Main Menu, access Personnel to view, add, modify or
delete data or entire records pertaining to staff members and their training
history, assigned work orders and tool issue history, security rights
for individual staff members and groups and user asset grouping.
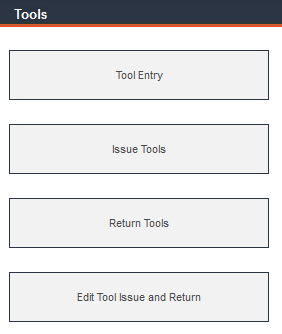
From the Main Menu, access Tools to view, add, modify or delete
data or entire records pertaining to tools, including issuance and return.
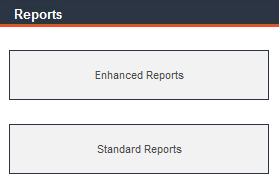
From the Main Menu, access Reports to view both Enhanced and
Standard Reports. Click any report category to open a list of reports
within that category.
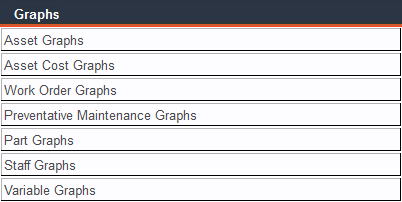
From the Main Menu, access Graphs for a visual representation
of data. Click any graph type to open a list of graphs within that type.
The Configuration, Data Tools, Utilities and System Info sections are
covered in the Administrator portion of this guide.